Easy
How to send crypto from Binance to your wallet? Complete tutorial
Have you just created your first crypto wallet and want to transfer your initial assets from Binance to it? You've come to the right place. Here, you'll learn step-by-step how to move your crypto from the exchange to a wallet where you control the private keys . No unnecessary jargon: let's get straight to the point so you can secure your tokens and master the transfer process.
Table of contents
Why transfer your cryptocurrencies from Binance to a wallet?
If you're a beginner, you might be wondering if it's really necessary to transfer your crypto to an external wallet when it's already available in your Binance . The answer is simple: your personal crypto wallet allows you to truly own your private keys, increasing your security and freeing you from complete dependence on the exchange platform.
According to Chainalysis' 2022 report , cryptocurrency hacks reached a record high, with $3.8 billion stolen during the year. DeFi protocols , which accounted for 82.1% of the stolen funds, or approximately $3.1 billion . Furthermore, a centralized exchange can go bankrupt at any time, jeopardizing the protection of your funds, as we saw with Mt. Gox and FTX Keeping your funds in a wallet you control strengthens the protection of your cryptocurrencies.
Sending crypto from Binance to your wallet: Step 1, Secure your Binance
First, check the following settings:
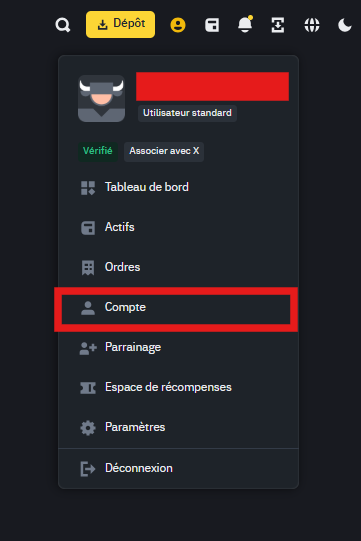
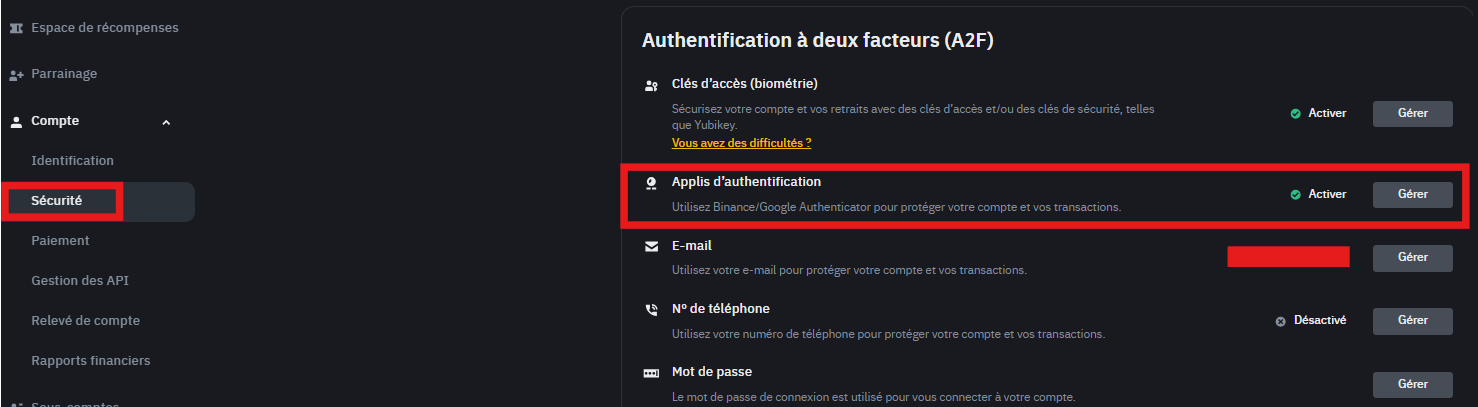
Enable two-step security and verification (2FA)
To secure your account and prevent unauthorized individuals from withdrawing your cryptocurrencies, enable two-factor authentication. Go to “Account” → “Security” and configure authentication via Google Authenticator or SMS.
Sending crypto from Binance to your wallet: Step 2, Choose and configure the wallet
There are several types of wallets: hardware wallets ( Ledger , Trezor ) and hot wallet ( Exodus, MetaMask, Binance Wallet, etc.). Each solution has its advantages and disadvantages:
Hardware wallets ( Ledger , Trezor ) : A hardware wallet is a physical device that stores your private keys offline to protect your cryptocurrencies from hacking and online attacks. Ledger and Trezor are two of the most widely used solutions. Ledger offers enhanced security thanks to its Secure Element chip and broad support for cryptocurrencies ltc its Ledger Live app, while Trezor stands out for its open-source firmware, guaranteeing transparency and complete control for the user.
To help you make the best choice, we invite you to consult our guides to find out which ledger to choose and our comparison between Ledger and Trezor which details their respective advantages.
Hot wallet ( Trust Wallet , Exodus) : connected to the Internet, more convenient for fast transactions, but potentially more vulnerable than an offline wallet.
Check blockchain compatibility
When you generate a crypto wallet , it is associated with a seed phrase . From this phrase, a separate public address is derived for each supported blockchain network ( Ethereum , Solana , Base, BNB Smart Chain, etc.). This means that your wallet does not have a single universal address for all blockchains, but rather a specific address for each network .
It is therefore imperative that the network selected when sending cryptocurrencies from Binance exactly matches the network of the receiving address in your wallet. If you select an incompatible network, your funds are highly likely to be irretrievably lost .
Concrete example:
- If you are sending ETH on the Ethereum (ERC-20) , you must use your wallet's receiving address on the Ethereum .
- If you send BNB on Binance Smart Chain (BEP-20) , the receiving address must be that of the BNB Smart Chain .
- If you are transferring USDT USDT you must choose the network that corresponds to your receiving address (e.g., ERC-20 for Ethereum , TRC-20 for Tron, BEP-20 for Binance Smart Chain).
⚠️ Common mistake to avoid : If you send ETH using the BNB Smart Chain (BEP-20) network, but your wallet displays the Ethereum (ERC-20), your ETH will be sent to the BSC blockchain and will not appear Ethereum wallet . Retrieving these funds can be extremely difficult, if not impossible.
Always check that the network chosen on Binance matches the receiving network of your wallet before confirming a transfer.
For this example, let's take a transfer of BNB on the BSC ( Binance smart chain) network from Binance to an Exodus wallet.
Sending crypto from Binance to your wallet: Step 3, Locate the “Withdraw” function on Binance
The procedure for sending cryptocurrencies from Binance to a wallet is done via the “Withdrawals” tab. To do this:
Log in to your Binance .
In the top menu, go to “Assets” → “Spot Wallet”.
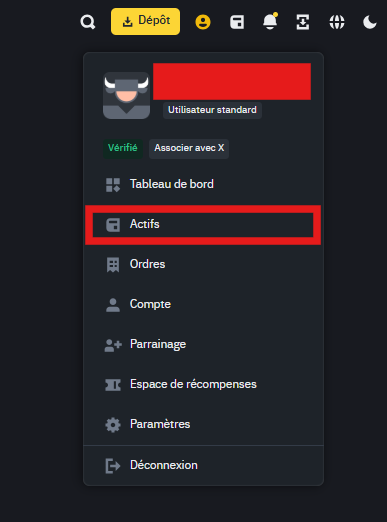
Next, locate the “Withdraw” or “Retrait” section.
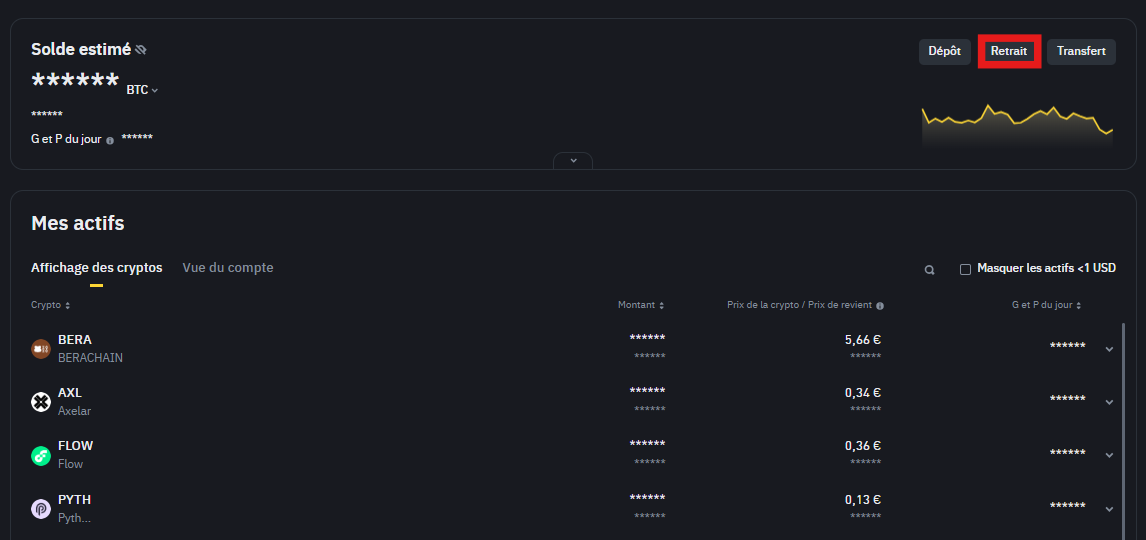
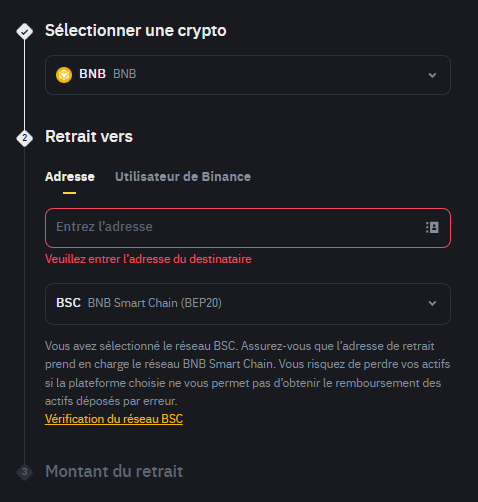
Information to prepare
– The network (blockchain) used for this withdrawal.
– The cryptocurrency you want to send
– The public receiving address (that of your wallet).
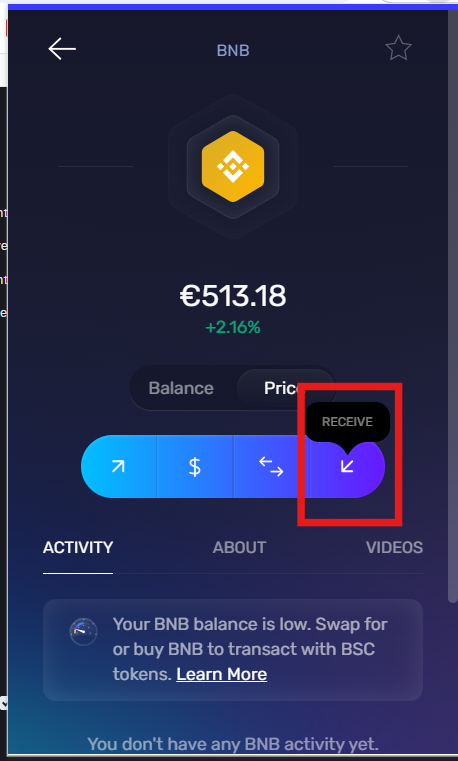
Sending crypto from Binance to your wallet: Step 4, Copy your wallet address
Generate the drop-off address
To retrieve the deposit address, go to your wallet (here, Exodus) and select the asset you want to receive, then copy the receiving address.
Verify that the blockchain displayed in your wallet matches the one you will select on Binance .
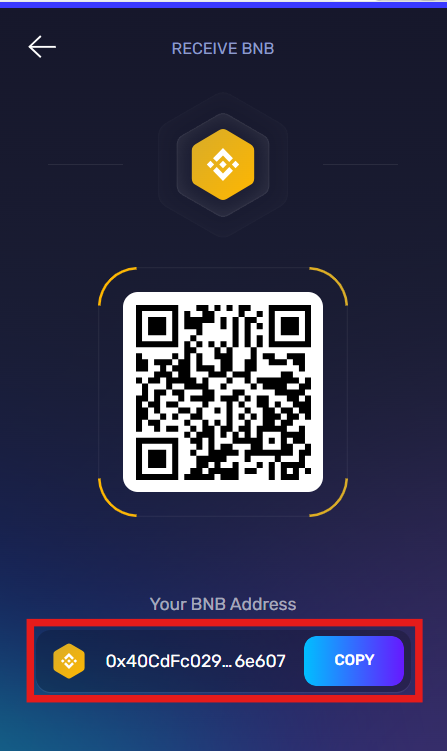
Check and validate the address
Compare the address shown in your wallet to the one you are copying. If there is an error, your funds could be sent to the wrong address and would be unrecoverable. We recommend copying the address and then pasting it rather than typing it manually.
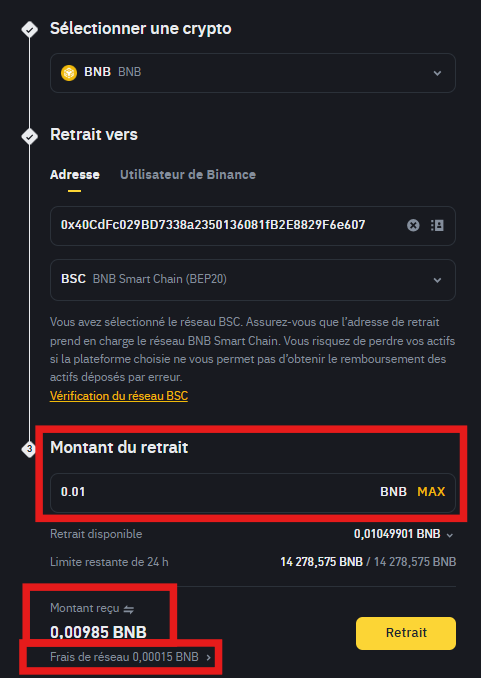
Sending crypto from Binance to your wallet: Step 5, Select the correct blockchain on Binance
When you paste the address into the designated field, Binance sometimes automatically detects the destination network. If not, manually select the correct blockchain. Keep in mind that some cryptocurrencies are available on networks other than their original network. For example, you can sendEthereum on the BSC network.
Sending crypto from Binance to your wallet: Step 6, Specify the amount and review network fees
Enter the amount of cryptocurrency you wish to withdraw. Binance will then display the transaction fees (or gas fees). These fees vary depending on network congestion and are deducted from the total amount you send.
Some precautions:
If you're a beginner, start with a small test transfer to make sure everything is working.
Depending on the cryptocurrency, fees can be high (especially on the Ethereum during periods of high activity).
Sending crypto from Binance to your wallet: Step 7, Confirm the withdrawal and complete 2FA verification
When everything is correct (amount, destination address, network), click “Withdraw”. Binance authentication step ensures that you are the legitimate account owner.
Confirmation via SMS code or email
If you have set up two-factor authentication, you will receive a code via SMS or need to enter a 6-digit code using Google Authenticator. Enter these digits in the Binance interface to confirm. You will receive a validation message followed by a confirmation message.
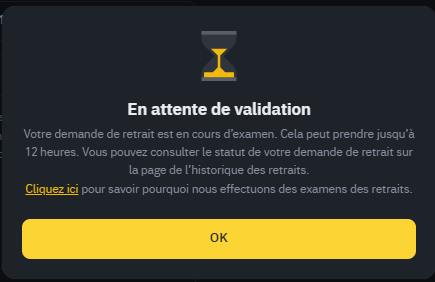
You can track the transaction status from Binance on the same page.

Processing time
After validation, the transaction is submitted to the relevant blockchain. Processing time depends on the blockchain's speed. On Bitcoin, the first confirmation can take up to 10 minutes. On Ethereum, it's often faster, but this varies depending on network congestion.
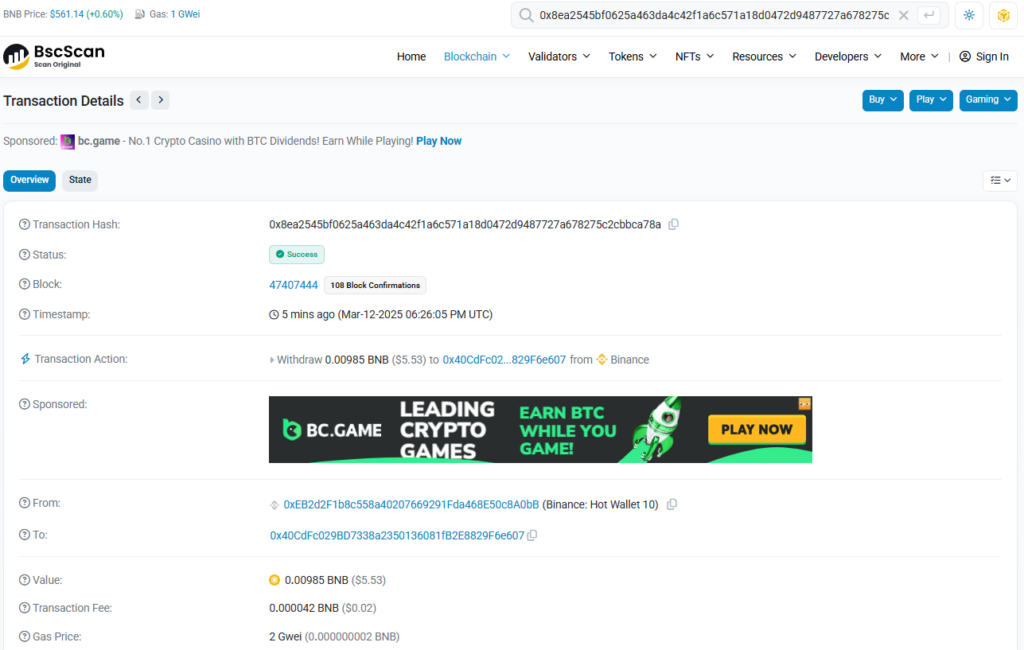
Sending crypto from Binance to your wallet: Step 8, Verify the transaction on a blockchain explorer
To ensure everything went smoothly, you can consult the blockchain explorer corresponding to the blockchain used. Here are a few examples:
- Etherscan for Ethereum.
- BscScan for Binance Smart Chain.
- Blockchain.com Explorer for Bitcoin.
Copy your public address or the transaction ID provided by Binance, then paste it into the explorer's search bar. You will then see your transaction status, the number of confirmations, the date, and the amount.
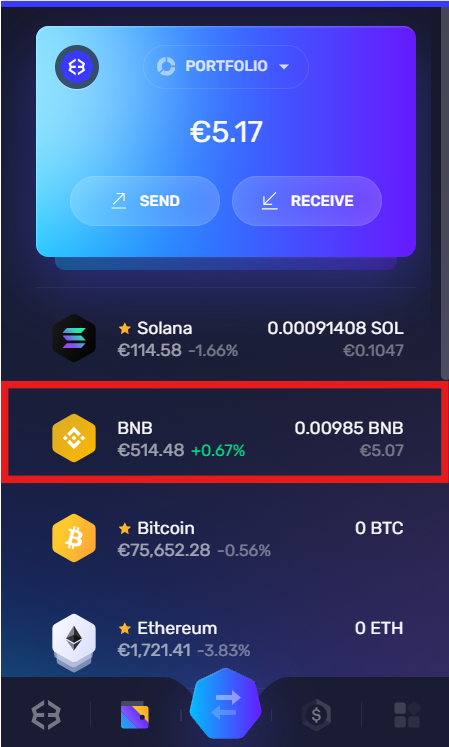
Transaction confirmed: what to do next?
Once the transaction is confirmed, you should see the balance appear in your wallet. If you're unsure, check that the token has been added to your interface. Some wallets don't automatically display all tokens; you may need to manually add the token contract if you don't yet see your funds.
Sending crypto from Binance to your wallet: Step 9, Manage and secure your cryptos in your wallet
Now that your assets are in your own crypto wallet, you have complete control over them. Your private keys must remain confidential. Here are some best practices:
Save your recovery phrase
Whether you use a hardware wallet or a hot wallet, write down your recovery phrase on a piece of paper, keep it in a safe place, and ideally store it in two separate locations. If you lose it, this is your only way to recover your tokens.
Check for updates regularly
– Ledger : Keep your Ledger Live and device firmware up to date.
– Trust Wallet or Exodus: make sure you are using the latest version to benefit from security patches.
Diversify your portfolios
If you hold multiple cryptocurrencies (Bitcoin, Ether, stablecoin , NFTs, etc.), you can spread your assets across different wallets. This can reduce the risk in case a single wallet is hacked or a recovery phrase is accidentally lost.
Sending crypto from Binance to your wallet: Step 10, What to do if there's a problem?
Despite all precautions, you may still encounter a problem. Here are some possible scenarios and solutions:
I can't see my cryptocurrencies in my wallet
– Check that you have selected the correct network. For example, if you sent ERC-20 tokens ( Ethereumnetwork) to your BEP-20 address ( Binance smart chain network), they will not appear automatically.
– Check that you have added the token contract to your wallet.
I made a mistake with the address
Unfortunately, if the transaction has been confirmed but the address is incorrect, recovering your funds is virtually impossible. That's why it's crucial to double-check the address before confirming.
My network charges are too high
– You can wait for a time of less congestion or choose another network (if the crypto is available on multiple blockchains).
Assistance and support
Binance offers a support center. If you suspect a problem on Binanceend, contact their support and explain the situation.
– Also check if your wallet has customer service or official documentation.
Sending crypto from Binance to your wallet: Additional steps for a first transfer
Send a small test shipment
If you're hesitant or worried about losing a large amount, send a few dollars worth of crypto first. Wait for confirmation and, if everything is in order, proceed with the main transfer.
Monitor volatility
When you switch from an exchange to a wallet, you are exposed to market fluctuations. Transaction times on some blockchains can be long enough for the cryptocurrency's value to change significantly if prices are highly volatile. Monitoring the price can be helpful.
Use the whitelist on Binance
For added security, you can activate the “address whitelist” in your withdrawal settings. This allows only addresses you have manually added to your account to be authorized for withdrawals. This reduces the risk of your Binanceaccount being hacked.
Sending crypto from Binance to your wallet: Best practices to optimize the experience
Holding some native crypto for gas fees
On each blockchain, you will need a minimum balance of the native cryptocurrency to pay transaction fees (e.g., BNB for the BSC, ETH for the Ethereum , etc.). Without this, you will not be able to transfer or interact with smart contract contracts .
Understanding the concept of cross-chain
Some exchanges offer cross-chain bridges or gateways to move your cryptocurrencies from one blockchain to another. If you use DeFi applications, you may need to use these bridges. Be sure to follow the correct protocols, as sending a token to the wrong network can block it.
Going further: integrating DeFi
After learning how to send binance to your wallet, you can explore dApp applications ). With your crypto in a non-custodial wallet, you can interact with lending and yield farming protocols, trade tokens via AMMs (Automated Market Maker ) like PancakeSwap, Uniswap , or Raydium , or even buy NFTs. In short, a personal wallet opens the door to the DeFi universe.
Participate in airdrops and staking opportunities
Many DeFi projects offer airdrops or staking to holders of certain tokens. If your cryptocurrencies are only held on an exchange, you risk missing out on these opportunities, as they are often reserved for decentralized addresses.
Tips for securing your wallet and assets
Keep your private keys offline
A simple file on your computer can be hacked. Ideally, you should write them down on paper or use a hardware wallet. Attacks targeting software wallets on smartphones or computers are not uncommon, especially if you download apps or browse unfamiliar websites.
Beware of scams
If you receive an email or message asking for your recovery phrase or private keys, it's a scam. Never share this information. Legitimate platforms will never ask for your recovery phrase.
Consider rotating your passwords
For your Binanceaccount, change your password regularly and keep it in a safe place. The same goes for any associated email addresses. Hackers often target email accounts to gain control of linked accounts.
Conclusion
In short, knowing how to send cryptocurrency from binance to your wallet is essential for anyone who wants to move from being a simple exchange user to a true owner of their digital assets. This allows you to control your private keys, maximize your security, and take advantage of the entire decentralized ecosystem (DeFi, staking , NFTs, airdrops, etc.).
If you also plan to convert your digital assets to fiat currency and then withdraw your money , be aware that transferring funds from Binance to your bank account follows a different process. We recommend consulting our dedicated article on this topic to fully understand the steps and avoid mistakes by following the text in blue.
By following the steps outlined above and paying close attention to the technical details (correct address, suitable network, two-factor authentication, etc.), your cryptocurrency transfer will go smoothly, even if you're a beginner. Exercise caution, double-check your actions, and enjoy the independence that a personal wallet provides.
Investments in cryptocurrencies are risky. Crypternon could not be held responsible, directly or indirectly, for any damage or loss caused following the use of a property or service put forward in this article. Readers must do their own research before undertaking any action and investing only within the limits of their financial capacities. Past performance does not guarantee future results. This article does not constitute an investment .
Certain links of this article are sponsorship links, which means that if you buy a product or you register via these links, we will collect a commission on the part of the sponsored company. These commissions do not train any additional cost for you as a user and certain sponsorships allow you to access promotions.
AMF recommendations. There is no guaranteed high yield, a product with high performance potential implies a high risk. This risk taking must be in line with your project, your investment horizon and your ability to lose part of this savings. Do not invest if you are not ready to lose all or part of your capital .
To go further, read our pages legal notices , privacy policy and general conditions of use .

Yoann
Training engineer, I quickly became interested in the field of finance. Convinced that decentralized finance has a bright future ahead of it, I participate in its democratization by developing Crypternon.